
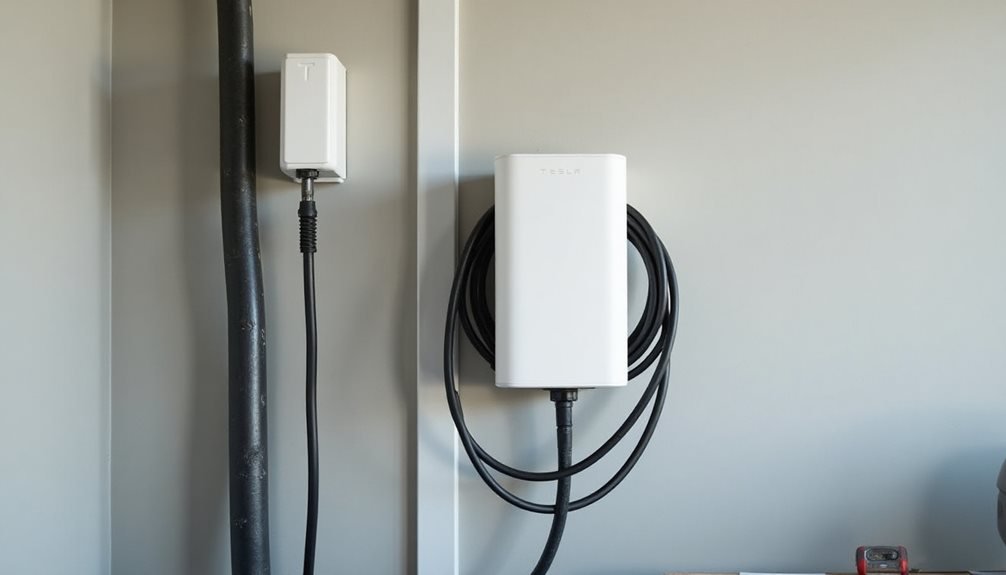
Installing a Tesla Wall Charger demands upgrading to 200-amp electrical service and dedicating a 60-amp breaker. Homeowners run 6 AWG wiring through conduit, mount baseplates at code height, and torque connections to exactly 50 inch-pounds. Multiple hardware store trips are inevitable. The Tesla app handles configuration via QR code scanning, Wi-Fi setup, and firmware updates. Most people uncover the electrical work exceeds their comfort zone. The installation process reveals why professional electricians exist in the first place.
Why do Tesla owners assume installing a wall charger is as simple as plugging in a toaster? The reality hits when they realize their home needs a minimum 200-amp electrical service and clean access to the circuit breaker box. Most realize they’ll need a dedicated 60-amp breaker. This isn’t smartphone territory.
The DIY fantasy crumbles when homeowners discover their garage outlet won’t handle industrial-grade electrical requirements.
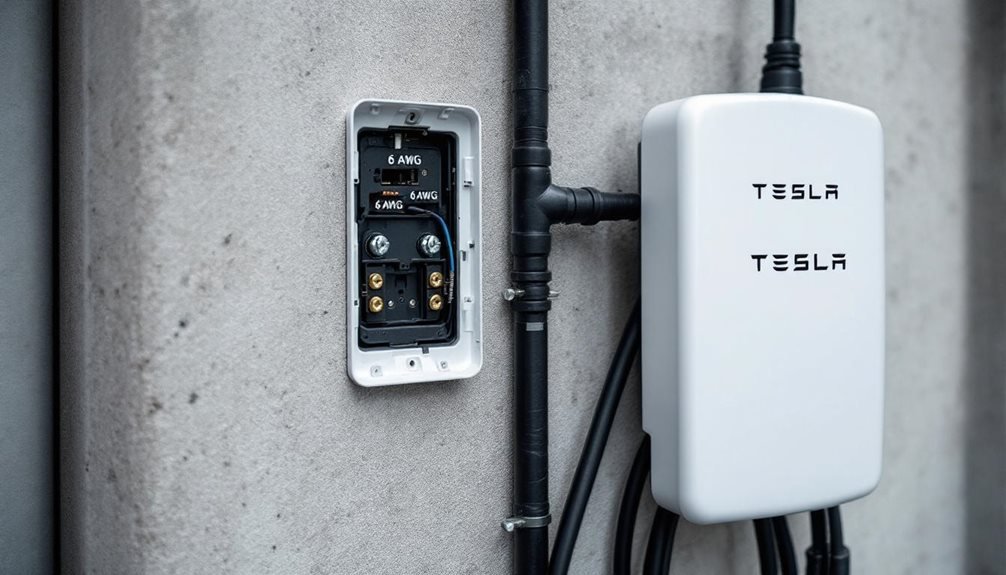
The preparation phase separates dreamers from doers. Homeowners must assess existing wiring capacity, guarantee code compliance, and map conduit routing for 6 AWG wiring. They’ll gather tools like Torx drivers, torque wrenches, sealant, and voltage testers.
Smart installers plan multiple hardware store trips because nobody gets the conduit type right the first time.
Installing the charger follows a methodical sequence. Mount baseplates to the wall at code-required height. Run conduit through walls or garage openings, sealing every gap with silicone. The charger attaches to baseplates using a Torx driver at precisely 50 inch-pounds of torque. Then comes the nerve-wracking part: installing that 60-amp circuit breaker in the main panel.
Electrical connections demand precision. Connect 6 AWG wires to corresponding charger terminals using provided Torx bits. The design features an open wire box with integrated terminals for straightforward hookup. Apply silicone sealant at conduit entries and elevated zones. Tighten connectors per manufacturer specifications. Visual inspection of all wire and conduit connections follows.
Device commissioning sounds technical but mostly involves staring at phone screens. Open the Tesla app, scan the QR code from packaging, configure circuit breaker rating and output amperage. Connect the charger to Wi-Fi for automatic firmware updates. Test charging operation to confirm everything actually works. Always verify circuits are off with a voltage detector before beginning any electrical work.
Post-installation steps include registering the charger in the Tesla app to access charging statistics. Enable Power Management features through the app interface. Monitor update notifications and apply firmware patches when they arrive. Schedule routine electrical safety checks because electricity doesn’t forgive shortcuts. Planning for charging infrastructure becomes crucial when considering your Tesla’s daily energy needs and usage patterns. Additionally, to optimize cost and efficiency, it’s advisable to schedule Tesla charging offpeak, taking advantage of lower electricity rates during non-peak hours. This strategy not only helps in reducing overall energy expenses but also contributes to a more balanced load on the electrical grid. Make sure to adjust your charging preferences within the app to align with your electricity provider’s off-peak times for maximum savings. Additionally, familiarize yourself with your Tesla charging station overview to optimize usage and understand the various charging options available. This knowledge will help you adapt your charging habits to maximize efficiency and minimize costs. Finally, make a habit of reviewing your charging statistics regularly to identify trends and adjust your energy plan accordingly. Additionally, familiarize yourself with the best practices for Tesla charging to maximize efficiency and prolong battery life. This includes charging during off-peak hours and avoiding frequent use of superchargers, which can lead to faster battery degradation. Staying informed about software updates and adapting to new features can further enhance your charging experience.
Troubleshooting becomes inevitable. Check circuit breaker alignment when the charger mysteriously deactivates. Troubleshoot Wi-Fi connectivity for update failures. Inspect silicone seals at conduit junctions for weatherproofing. Re-torque connector screws to 50 inch-pounds annually. When everything fails, contact Tesla Support and hope their hold music isn’t terrible.
Frequently Asked Questions
Can I Install a Tesla Wall Charger if I Rent My Home?
Renters face a bureaucratic nightmare installing Tesla wall chargers. Landlord permission is mandatory for electrical modifications—no exceptions. Most lease agreements explicitly prohibit permanent installations, and unauthorized work risks eviction.
The electrical infrastructure needs a dedicated 240V circuit, requiring permits and licensed electricians. Restoration clauses mean ripping everything out when moving.
Portable charging solutions exist, but they’re slower and less convenient than hardwired units.
Will a Tesla Wall Charger Work With Other Electric Vehicle Brands?
Tesla Wall Connectors work with other EVs, but it’s complicated. Gen 3 models can be software-adjusted for non-Tesla vehicles during installation.
Gen 1 requires flipping physical switches inside the unit.
Gen 2? Forget it—locked to Teslas only.
Most EVs need NACS adapters since they use CCS connectors.
Charging speeds vary wildly depending on each vehicle’s onboard charger capabilities.
How Much Does It Cost to Run a Tesla Wall Charger Monthly?
Running a Tesla Wall Charger monthly costs $39-$57 for most Tesla models, though the Cybertruck hits $65-$73. That’s assuming typical driving habits and home charging. Keep in mind that these costs do not include tesla wall charger installation expenses, which can vary based on the complexity of the installation and local labor rates. Proper installation is crucial for efficiency and ensuring the safety of your home charging system. Overall, considering both charging and installation expenses will give you a clearer picture of the total cost of owning a Tesla.
Location matters big time – California owners get hammered with 18+ cents per kWh, while Texas drivers cruise at around 12 cents.
Solar panels slash costs to roughly $0.06 per kWh, cutting bills by 75%. Otherwise, expect your electricity bill to jump 20-30%.
Can I Use My Tesla Wall Charger During a Power Outage?
Tesla Wall Chargers can work during outages, but they need backup power. The charger itself doesn’t store energy—it’s just a fancy cable, basically. Users need a Powerwall and solar panels to keep things running when the grid fails.
The system automatically starts charging when power cuts out. However, charging might slow down or stop completely if home appliances start hogging power.
Does Installing a Tesla Wall Charger Void My Home Insurance Policy?
Installing a Tesla wall charger won’t automatically void home insurance, but the devil’s in the details. Licensed electrician installation is basically mandatory—DIY wiring can kill coverage faster than you can say “electrical fire.” It’s crucial to document the process to ensure compliance with your insurer’s requirements. Following the tesla powerwall installation steps can help provide a clear outline for both safety and documentation purposes. Always consult with your insurance provider before proceeding to avoid any surprises down the line.
Most home policies cover properly installed Level 2 chargers. However, damages from electrical malfunctions or non-compliant installations? Good luck with that claim.
Fire-prone areas face stricter conditions.